Chained and Named Transformations with Cloudinary
One of the big advantages to using Cloudinary is the ability to dynamically create images on the fly by modifying the URL via a directory structure-like pattern. For example, adding w_300 to the URL path of an image hosted by Cloudinary generates an image with a width of 300 pixels, saving you the time of manually generating and uploading a new image. Dimension modification is the simplest of transformations -- you can add Instagram-like filters, shape clipping, and much more.
I wanted to take a quick moment to touch on two advanced transformation techniques from Cloudinary: chaining transformations and creating named transformations!
Chaining Transformations
There may be cases where you will want to implement chained transformations; get an image to a certain state, make a few updates to make it another state, and so on. To generate a cropped image of 300x300, you can use the following the c_crop,w_300,h_300 URL path:
https://res.cloudinary.com/demo/image/upload/c_crop,w_300,h_300/flower.jpg
To add a second chained transformation you can add another transformation string; for example, scale to 150 pixels:
https://res.cloudinary.com/demo/image/upload/c_crop,w_300,h_300/c_scale,w_150,r_max/flower.jpg

Let's do more chaining to really modify the original image:
https://res.cloudinary.com/demo/image/upload/c_crop,h_100,w_150,x_380,y_250/c_fill,h_100,w_130/a_20/c_scale,w_0.8/flower.jpg
In the end you get something like this:

Also remember that Cloudinary provides APIs in Node.js, Python, PHP, and so on, and you can easily use their helper methods to generate the image URL:
cloudinary.image("flower.jpg", {transformation: [
  {height: 100, width: 150, x: 380, y: 250, crop: "crop"},
  {height: 100, width: 130, crop: "fill"},
  {angle: 20},
  {width: 0.8, crop: "scale"}
]})
Chained transformations via URL modification is amazingly powerful but long URLs can be a burden to work with and remember -- that's where Cloudinary's named transformations come into play.
Named Transformations
The ability to chain transformations is awesome but using multiple transformations can make the URLs very long and cumbersome to type out. Cloudinary has a solution for you: named transformations. To created custom transformation names, log into your Cloudinary control panel, visit "Transformation" and then click "Create a new transformation":
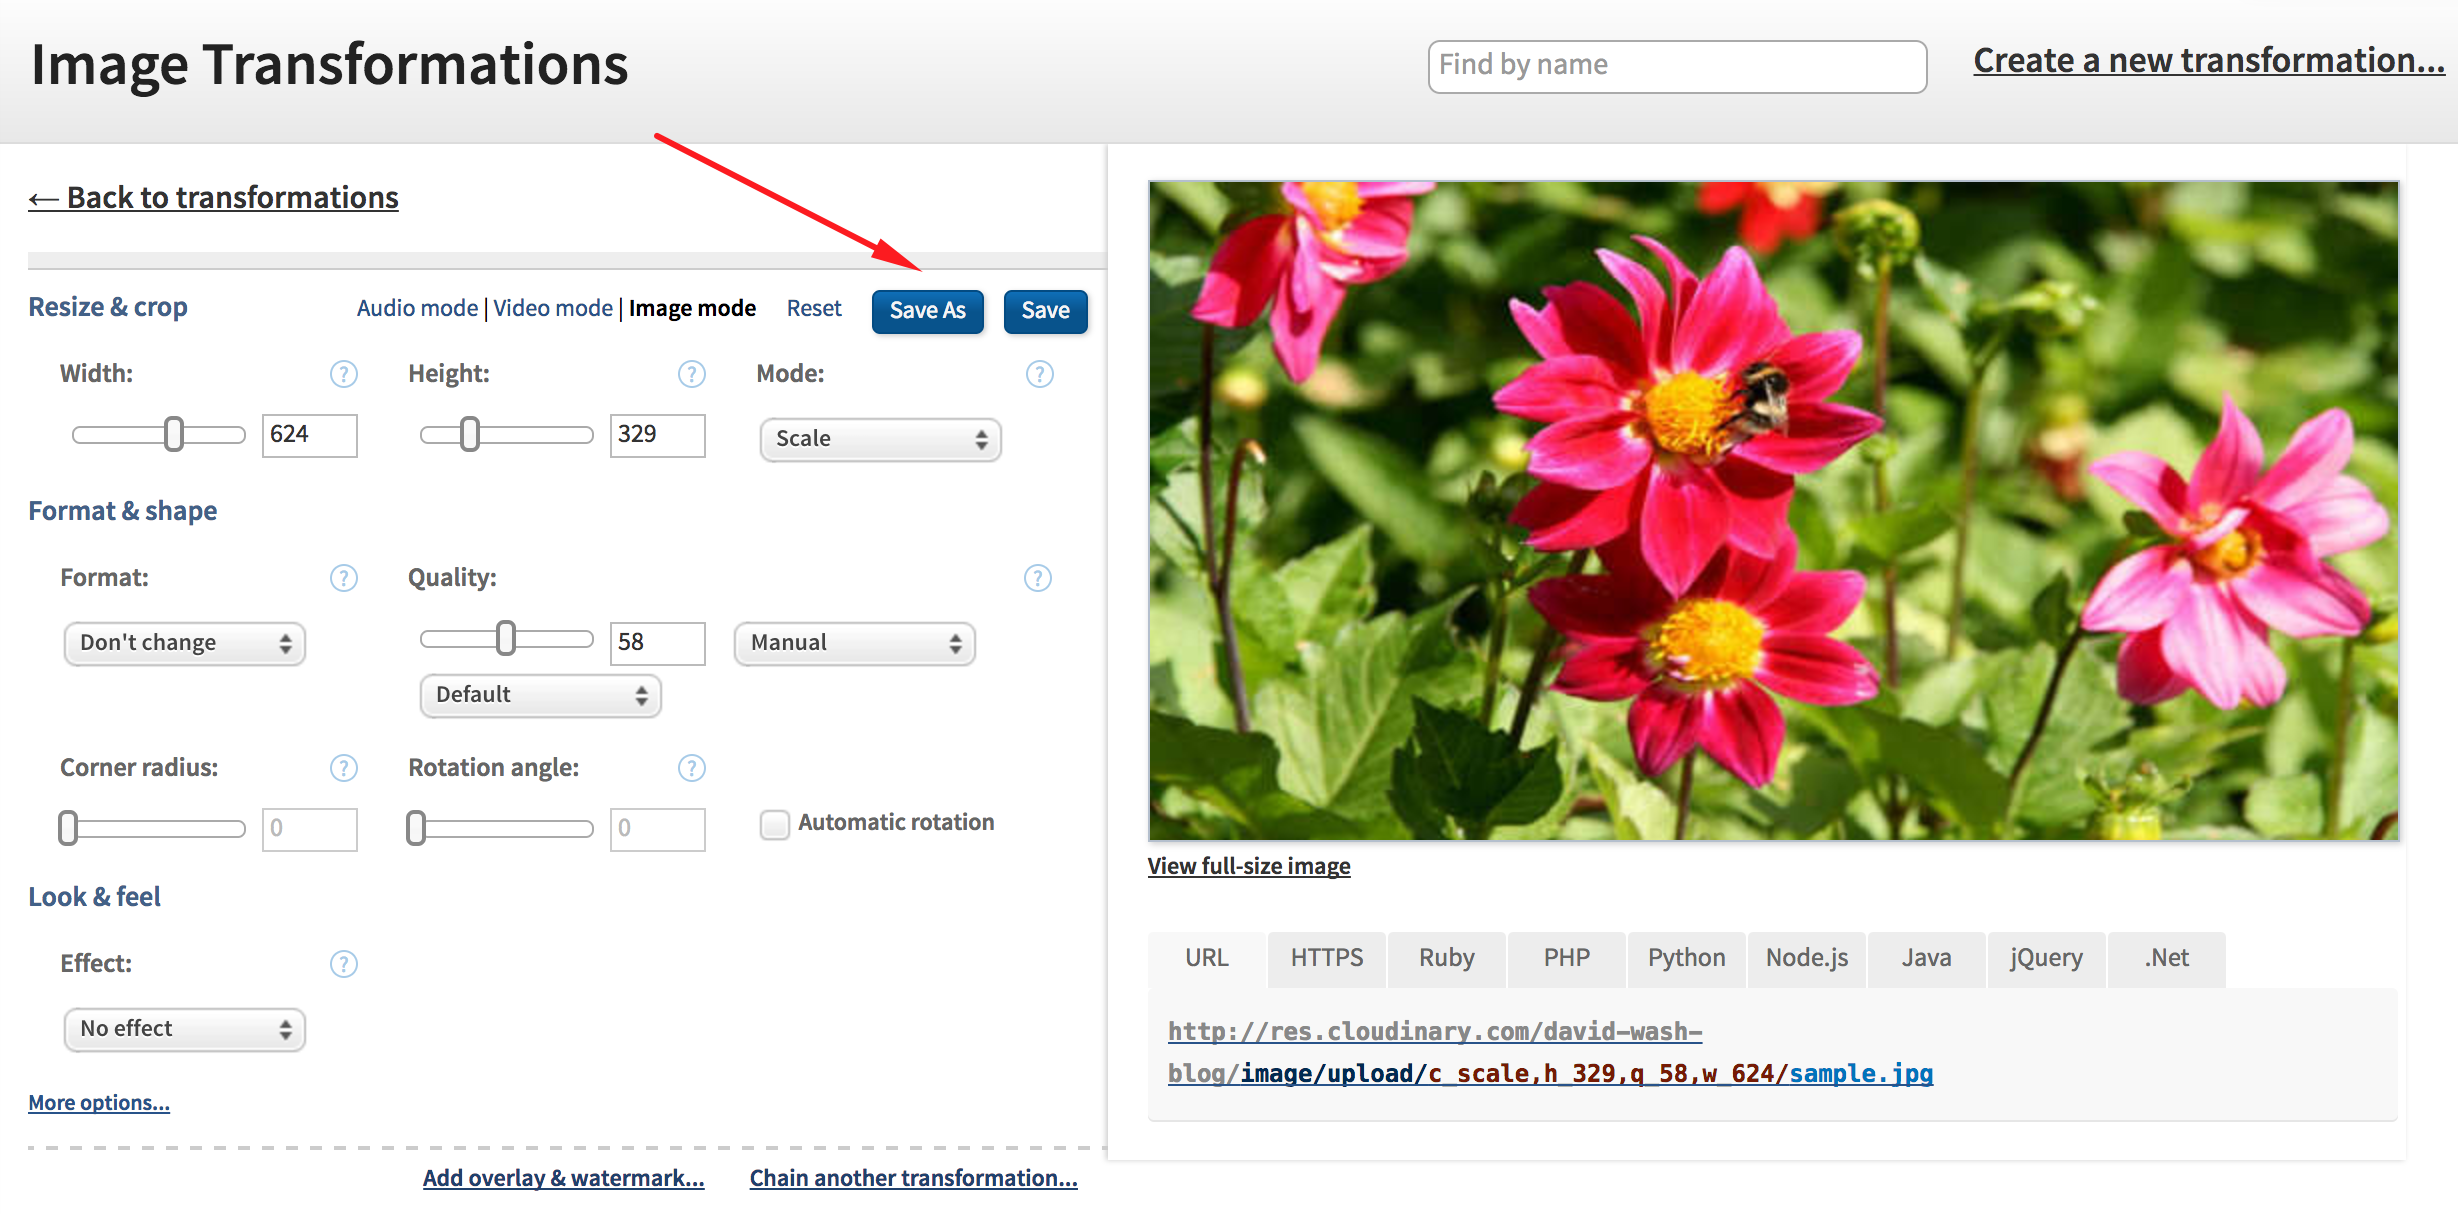
What I love about this interface is that you're provided a sample image and numerous controls to allow you to easily generate the underlying transformation code. Once you're satisfied with your transformation, click "Save As", give your transformation a name, and your transformation will be saved for future use.
In the end you can turn a transformation URL string from c_scale,h_329,q_58,w_624 to t_preview_image, which should aid you in development speed. You can modify your named transformation at any time, which comes in handy if you redesign your site but don't want to keep the same image URLs. Cloudinary allows you to create an unlimited number of custom transformations names and I highly recommend that you use them.
Cloudinary continues to impress me with their vast array of functionality: removing backgrounds, creating waveform images, adding Instagram-like artistic filters, image autotagging, and much more. Even without fancy effects, Cloudinary has immense value in optimized delivery and storage of photos. Cloudinary allows you to sign up for a free account so give it a shot -- it's well worth the time!