Instagram For MooTools
If you're still rocking an iPhone and fancy taking a photo every now and then, you'd be crazy not to be using an app called Instagram. With Instagram you take the photos just as you would with your native iPhone camera app, but Instagram provides a number of image filters to enhance the appearance of the image you've taken. You can make your photo look brighter, darker, "older", and much more. The photo is saved both on Instagram's service and your local phone.
Like any other service, Instagram also provides an API which allows you to get image, user, tag, and other account information. Christopher Beloch has taken the time to provide a simple set of MooTools classes which act as a wrapper for Instagram's web API. This post will show you how to use Instagram's API, Instagram for MooTools, and some simple CSS and JavaScript to create a very simple photo gallery with which you can view all of your photos at once.
You must have an Instagram account to view the demo; there's currently no way for me to open my account for viewing only. Also note that Instagram provides a server-side implementation for OpenAuth; this post will focus on client side only. Lastly, this post's focus is using Instagram for MooTools (authentication, pulling photos, etc.); not creating the most shocking photo gallery ever.
OpenAuth and Creating "Apps"
Instagram subscribes to the OpenAuth method of verification that applications like Facebook and Twitter use. To create an Instagram usage client, click here. There are two important piece of information which you'll need to remember from this page: a ClientID which will be used to log into your OpenAuth account, and a RedirectURI which the user will be redirected to once they log in. Creating the app is very simple and you should be through it in a minute -- just remember to save the generated ClientID and RedirectURI you chose.
Including Instagram for MooTools and Dependencies

Instagram for MooTools is available on the JavaScript treasure chest MooTools Forge. This set of classes requires MooTools Core and More's Request.JSONP. The basic photo gallery I create will use More's Element.Delegation, but this class isn't required to use Instagram for MooTools. There are multiple classes available with Instagram For MooTools, but the quick photo gallery will only use Base (required for all subclasses) and User (which allows for retrieval of user media).
Logging In
My page which will host the photo gallery will require authentication to request images. To make sure the user has proper authorization, we'll use this snippet of JavaScript:
// Basic settings
var clientId = "YOUR_CLIENT_ID";
var redirectUrl = "http://test.local/instagram.html";

// Create an instance of Instagram with user capabilities
var user = new Instagram({
	client_id: clientId,
	redirect_uri: redirectUrl
});

// If there's no hash, they aren't logged in
if(!window.location.hash) {
	window.location = user.getAuthURL();
}
The code above defines the ClientID and RedirectURI which were provided by Instagram, creates and instance of Instagram, and checks the window.location.hash to make sure an access token is present. If not, the user is sent to Instagram's sign-in page for this app. When the user signs in, they will be redirected to your RedirectURI with an access_token properties in the hash.
Simple Photo Gallery Layout
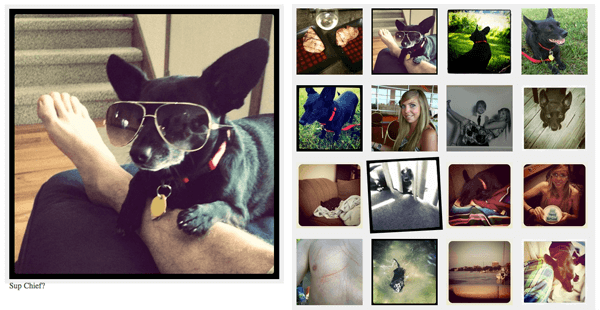
The photo gallery layout will be two columns: the first column containing the caption and large version of the image retrieved from the service, the second containing clickable thumbnails. The large image will be fixed to the top left, the thumbnails will scroll during page scroll. Here's our basic CSS:
#mediaHolderLoading {
	border-radius: 8px;
	background: #222;
	color: #fff;
	padding: 5px 10px;
	font-family: Monaco, Courier, Monospace;
	font-size: 12px;
	z-index:200;
}
#mediaHolder.noPhotos #mediaHolderLoading {
	background: inherit;
	color: #f00;
}

#mediaHolder.noPhotos #largeImageHolder {
	display:none;
}

#largeImageHolder {
	width: 612px;
	height: 612px;
	position: fixed;
	top: 24px;
	left: 27px;
	padding:10px;
	background: #eee;
}

#caption {
	font-size:18px;
	color:#444;
}

#thumbHolder {
	margin-left: 650px;
	margin-top: -5px;
	opacity: 0;
	padding:10px;
	background: #eee;
}

#thumbHolder a {
	width: 150px;
	height: 150px;
	padding: 0 20px 20px 0;
	display: inline-block;
}

#thumbHolder img {
	display:block;
}

#thumbHolder img:hover {
	display:block;
	-webkit-transform: rotate(-3deg) scale(1.1);
	-moz-transform: rotate(-3deg) scale(1.1);
	-o-transform: rotate(-3deg) scale(1.1);
	-ms-transform: rotate(-3deg) scale(1.1);
	transform: rotate(-3deg) scale(1.1);
}
And the HTML it will style:
<div id="mediaHolder">
	<span id="mediaHolderLoading">Loading your photos...</span>
	<div id="largeImageHolder">
		<img src="" id="largeImage" />
		<span id="caption"></span>
	</div>
	<div id="thumbHolder"></div>
</div>
Nothing groundbreaking or overly complex. Again, this is going to be a very simple gallery.
Using Instagram For MooTools to Retrieve Images
Assuming we're now logged in and authenticated, we can make our move to retrieve images. The getMedia method of our Instagram instance will send a JSONP request to Instagram to retrieve all of the authenticated user's photos:
// Makes a JSONP request to go get media
user.getUserMedia();
Before we send that request for images, however, we need to set up a listener for when those images are returned. After the browsing the Instagram.User and Instagram.Base source, I discovered the event to listen for is the mediaData event.
// Add listener for instagram data reception
user.addEvent("mediaData", function(userPhotos) {

	// If there are items received
	if(userPhotos.data.length) {
		 // Do something
	}
	else {
		// Show "no images" message
	}
});
The userPhotos var will provide an array with or without images based on the contents of your account. Iterate through the array to work with the result. The addEvent pattern is used throughout the Instagram classes; be sure to look around to find the proper event to listen to though, as it's not always apparent.
Gallery Creation
Now that we can receive and managed the result, it's time to use basic MooTools JavaScript code to build the thumbnails and delegate clicks to show the larger image:
// Add listener for instagram data reception
user.addEvent("mediaData", function(userPhotos) {

	// Get the media holder text
	var mediaHolderLoading = document.id("mediaHolderLoading"),
		mediaHolder = document.id("mediaHolder");

	// If there are items received
	if(userPhotos.data.length) {
		// Axe the message
		mediaHolderLoading.destroy();

		// Get a few elements
		var thumbHolder = document.id("thumbHolder"),
			largeImage = document.id("largeImage"),
			caption = document.id("caption");

		// Create the HTML string
		var html = "",
			template = '<a href="{largeImage}" target="_blank" data-index={index}><img src="{thumbnailImage}" alt="{caption}" /></a>';
		// For every photo received
		userPhotos.data.each(function(photo, index) {
			// Place caption text right on obj for easier access
			photo.captionText = (photo.caption ? photo.caption.text : "");
			// Append to html
			html += template.substitute({
				largeImage: photo.images.standard_resolution.url,
				thumbnailImage: photo.images.thumbnail.url,
				caption: photo.captionText,
				index: index
			});
		});
		// Set the large image and caption
		largeImage.set("src", userPhotos.data[0].images.standard_resolution.url);
		caption.set("html", userPhotos.data[0].captionText);

		// Get the thumb holder
		thumbHolder.set("html", html).fade(1);

		// Add event delgation to listen for clicks
		thumbHolder.addEvent("click:relay(a)", function(e, a) {
			e.stop();
			// Set the image
			largeImage.set("src",a.get("href"));
			// Get the caption
			caption.set("html", userPhotos.data[a.get("data-index")].captionText);
		});

	}
	else {
		mediaHolder.addClass("noPhotos");
		mediaHolderLoading.set("html", "No photos were found.");
	}
});
You'll note that instead of programmatically create and inject nodes into the thumbnail holder, I use string concatenation to generate the HTML. Doing so is faster than node injection. I've also used event delegation to avoid numerous event connections.
And there you have it: a quick overview of Instagram for MooTools. Christopher Beloch's work provides a great interface to Instagram's API. I look forward to seeing what you create with it!


Well, I followed you on Instagram. :)