Building Ambitious Web Applications with Ember.js
Ember.js is a solid single page application framework for building modern web applications.
Before Angular and React reached critical mass, Ember.js was leading the charge in building scalable single page applications. While the spotlight may have shifted, Ember.js remains a great and viable option for developers wanting to prototype and build modern front-end clients.
Ember is a great alternative to Angular 2 due to it's maturity. The Ember CLI was even used as inspiration for building the Angular 2 CLI to help developers scaffold their applications more effectively. Compared to React, Ember offers a bit more out of the box such as a routing and a well defined model structure.
In today's tutorial we are going to build a single page application with Ember.js 2.x. Ember.js 2.x, like Angular 2, is more of a framework and boasts a 10x performance improvement over the 1.x iteration. For our backend, instead of building and deploying a traditional web server, we'll build a Webtask that will provide server-side functionality. With the stage set, let's get started.
Building the Back-end with Webtask
The application we'll build with Ember.js will be an crowdsourcing app for events. The admins of the app will create events that the users of the platform can vote on. Each event will have a certain requirement of votes needed before that event can take place. Everyone will be able to view the events, but only authenticated users will be able to vote on events. We'll start by building our Webtask powered backend.
Webtask is a serverless, function-as-a-service, platform developed by Auth0 that allows developers to build micro-services and expose them via HTTP. If you don't already have a Webtask account, you can sign up for one free of charge here. Once you are signed up, you will need to install the Webtask CLI on your machine by running npm install wt-cli -g. Node.js and NPM are the only prerequisites needed.
Once you have the Webtask CLI installed, run the wt-cli init command and you will be asked for an email or phone number. Provide one of these, and you will receive a confirmation code that you will need to input in the CLI to complete the authentication process. Once that is done you are ready to write and deploy Webtasks.
There are many different approaches to writing Webtasks. We can write a Webtask that performs a single function, such as send a welcome email when a user registers, or we can write an entire application within the Webtask. We'll opt for the second option and build our entire backend implementation with a single Webtask. We want to focus on Ember.js, so we'll quickly go over this section. You can always learn more about how Webtask works by reading the docs.
Our Webtask will have four routes. The /events route will return a list of all available events, the /events/:id route will return a single event, a /events/:id PUT route will increment the vote count, and finally the ‘/seed' route will seed our database (Webtask storage) with some initial events to vote on.
Take a look at our backend implementation in the code below. The Webtask we are building will be very similar to a traditional Express.js application with some Webtask specific code. If any of the concepts do not make sense or you'd like some additional resources, check out the Webtask docs, specifically on storage and authentication to learn more. We will store this code in a file called api.js.
// Get our dependencies
var app = new (require('express'))();
var wt = require('webtask-tools');

// Define the events route which will retrieve a list of all events
app.get('/events', function(req, res){
    req.webtaskContext.storage.get(function (error, data) {
        if (error) return res.send(error);
        res.json({event: data});
    });
})

// Return a specific event based on the event ID attribute
app.get('/events/:id', function(req,res){
  req.webtaskContext.storage.get(function(error, data){
    if(error) return res.send(error);
    for(var i = 0; i < data.length; i++){
      if(req.params.id == data[i].id){
        res.json({event : data[i]})
      }
    }
  })
})

// The PUT request to the events/:id route will increment the vote count of the particular event
app.put('/events/:id', function(req, res){
  req.webtaskContext.storage.get(function(error, data){
    for(var i = 0; i < data.length; i++){
      if(req.params.id == data[i].id){
        data[i].votes += 1;
        req.webtaskContext.storage.set(data, function(err){
          res.json({status: 'ok'})
        })
      }
    }
  })
})

// Once our Webtask is live, we'll hit this route once, to seed our event database
app.get('/seed', function(req, res){
  req.webtaskContext.storage.get(function (error, data) {
    if (error) return cb(error);
      data = events();
      req.webtaskContext.storage.set(data, function (error) {
        if (error) return cb(error);
        res.json({status:'ok'});
      });
  });
})

module.exports = wt.fromExpress(app)

// This function will return our seed data.
function events(){
  return [
    {
      id: 10432,
      name : "Meet and Greet: Kobe Bryant",
      description: "See the legendary Kobe Bryant talk about his career with the NBA and how he became one of the greatest players of all time.",
      img : "",
      votes: 10289,
      required: 25000,
      featured: true
    },
    {
      id: 14582,
      name : "Marvel vs. DC at San Diego Comic Con",
      description: "Watch the battle between the greatest superheros at Comic Con 2017.",
      img : "",
      votes: 14900,
      required: 20000,
      featured: false
    },
    {
      id: 42000,
      name : "AMA: Elon Musk",
      description: "Ask Elon Musk anything. The CEO of Tesla and Space X has agreed to answer any and all of your questions.",
      img : "",
      votes: 10289,
      required: 10000,
      featured: false
    },
    {
      id: 54200,
      name : "Secret Event",
      description: "This could be anything. Vote to find out!!!",
      img : "",
      votes: 4754,
      required: 7500,
      featured: false
    },
    {
      id: 55900,
      name : "Meet the Developers",
      description: "Meet the developers building this awesome platform.",
      img : "",
      votes: 5900,
      required: 5000,
      featured: false
    },
  ]
}
With the implementation in place, we are ready to deploy our backend. Run the wt-cli create api.js command in the directory where your newly created api.js file resides and in a few seconds your Webtask will be created and deployed. Head over to the URL provided in the CLI and you'll see your code running. The first endpoint you should go to should be the /seed route as this will seed your Webtask storage with some events. So far so good. Let's get to building our front-end next.
Building our SPA with Ember.js
Ember.js pioneered the use of a command-line interface (CLI) for easily scaffolding and aiding in the development of web applications. In building our application, we'll make use of the CLI. To install the CLI, run the npm install ember-cli -g command. Again, Node.js and NPM are prerequisites to get the CLI. Once the CLI is installed, you are ready to start building your application.
To create a new Ember.js application, run ember new and a name for the app. Let's run ember new events-app. Ember will automatically create a new directory titled events-app, scaffold a basic application structure and get all the dependencies needed. This may take a few minutes to complete. Once the install is complete, navigate to the events-app directory by typing cd events-app and hitting the return key on your keyboard.
To make sure our app was initialized properly, let's run the ember server command and navigate to localhost:4200 in your browser. If you see a message saying “Congratulations you made it!”, then you are good to go. If not, I would suggest rerunning the ember new command as NPM and Bower can sometimes fail to download all the dependencies correctly.

Scaffolding an app in this manner gives us a very basic starting point great for building applications from scratch. We have an ambitious goal in this tutorial and a lot of ground to cover so we'll use a different starter project to continue our development. We'll use the Auth0 Ember.js Quickstart seed project as we are going to be adding user authentication to our app. Many of the topics we'll cover would be exactly the same as if you continued from the scaffold we created earlier, but this will allow us to move a little faster.
Head over to the Auth0 Ember.js 2 Quickstart and download the seed project provided. You will need to sign up for an Auth0 account to implement the authenticated user functionality, so if you don't already have an account you can sign up for one here. Once you've downloaded the quickstart, open the directory and run npm install followed by bower install. This will download and install all of the dependencies we'll need. With the dependencies installed, run ember server and navigate to localhost:4200 to see the default quickstart application.
Not much to it so far. Let's first configure some of the environmental settings and then we'll get on our way to building the application. Open the environement.js file located under the config directory. Within this file, navigate to the attribute titled Auth0 and change the clientID and domain settings to your Auth0 ClientID and Domain. You can find these values in your Auth0 management dashboard.
If you have your Ember server still running, you will notice that any changes you make are reflected in real time. This is another benefit of building the app with the CLI. The ember server command runs live-sync and watches your application, any time a change is made the server is automatically restarted.
We have a pretty good scaffold of our app now. Next, we'll want to do add the Bootstrap CSS library so we can easily style our application. Open the index.html file and in the head section add the Bootstrap 3 library from a CDN. We'll get Bootstrap from MaxCDN and add the following in our index.html page: <link href="https://maxcdn.bootstrapcdn.com/bootstrap/3.3.7/css/bootstrap.min.css" rel="stylesheet" > . If you look at your app now you will notice that it looks much better.
Let's go ahead and open the application.hbs file next. Edit the contents of the application.hbs file as follows:
{{outlet}}
For now, we will just have the file contain the single line {{outlet}}. If you have worked with previous SPA frameworks before, you may already know what this is for, but if not, this is where we will display components based on our router. Let's go ahead and create a route to see how this functionality works. The {{main-navigation}} component that we removed displayed our top navigation. We'll come back to it later.
In your terminal window type the following command ember generate route events and hit enter. This command will create a couple of different files for us. The first will be an events.js file where we can add in our front-end logic for the events route. Next, an events.hbs file for our template, and lastly the Ember CLI has taken care of adding the events route to our routes.js file.
For now, just go ahead and open the events.hbs file and add a title to our page. Add the following code: <h1>Events</h1>. Save the file and navigate to localhost:4200/events. You will see your title displayed. So far so good.
The next concept I'd like to introduce you to is components. Components in Ember.js allow us to build reusable snippets of functionality. We'll add a component that will display the details of each of our events. To create a component run ember generate component app-event. Each component you create will need to have a hyphen in it. The reason for this is compatibility. If you create a component called event and use it as <event></event> in your application and sometime in the future the W3C decides to implement an <event> tag - your application would likely break. The component we created will be implemented a little later, for now we are going to scaffold the rest of our routes.
We already have the events route that will display a list of all of our events. Next, let's create a route for displaying just a single event. Run ember generate route event. Once this is done, go ahead and open up the router.js file located under the app directory. This file contains our router data. We will want to do two things here. First we'll set a default route, to be our events route, next, we'll edit our event route to accept a route parameter. Take a look at the implementation below:
Router.map(function() {
  // Existing Routes added by the Auth0 Quickstart
  // We'll have a template for the existing index from the quick start.
  this.route(‘index');
  // Sets the default route to events
  this.route('events', { path: '/' });
  this.route('events')
  // Changes the default /event route to /event/:id where the :id is a variable
  this.route('event', {path: '/event/:id'});
});
We already had a couple of routes from the Auth0 Ember.js Quickstart, so we'll leave those as is for now, we'll just make some edits to our routes. Now that we have our routes defined, let's go and build our application.
Let's start with the root of our application. Open the main-navigation.hbs file located under templates/components. Replace the existing template code with:
<nav class="navbar navbar-default navbar-fixed-top">
  <div class="container-fluid">
    <div class="navbar-header">
      {{#link-to 'index' classNames='navbar-brand'}}
        Home
      {{/link-to}}
    </div>
    <ul class="nav navbar-nav navbar-left">
      {{#link-to 'events' tagName='li'}}
        <a>Events</a>
      {{/link-to}}
    </ul>
    {{! display logout button when the session is authenticated, login button otherwise }}
    {{#if session.isAuthenticated}}
      <a {{action 'logout'}} class="btn btn-danger navbar-btn navbar-right">Logout</a>
    {{else}}
      <a href="/login" class="btn btn-success navbar-btn navbar-right">Login</a>
    {{/if}}
  </div>
</nav>
Open the application.hbs file and add in the {{main-navigation}} component above the {{outlet}}. Check your application to make sure the new navigation bar is properly displayed. We'll also add a simple footer to our application.hbs file. Check out the completed implementation below:
{{main-navigation}}
{{outlet}}
<footer>
<p class="text-center text-muted"><small>© 2016 Events!</small></p>
</footer>
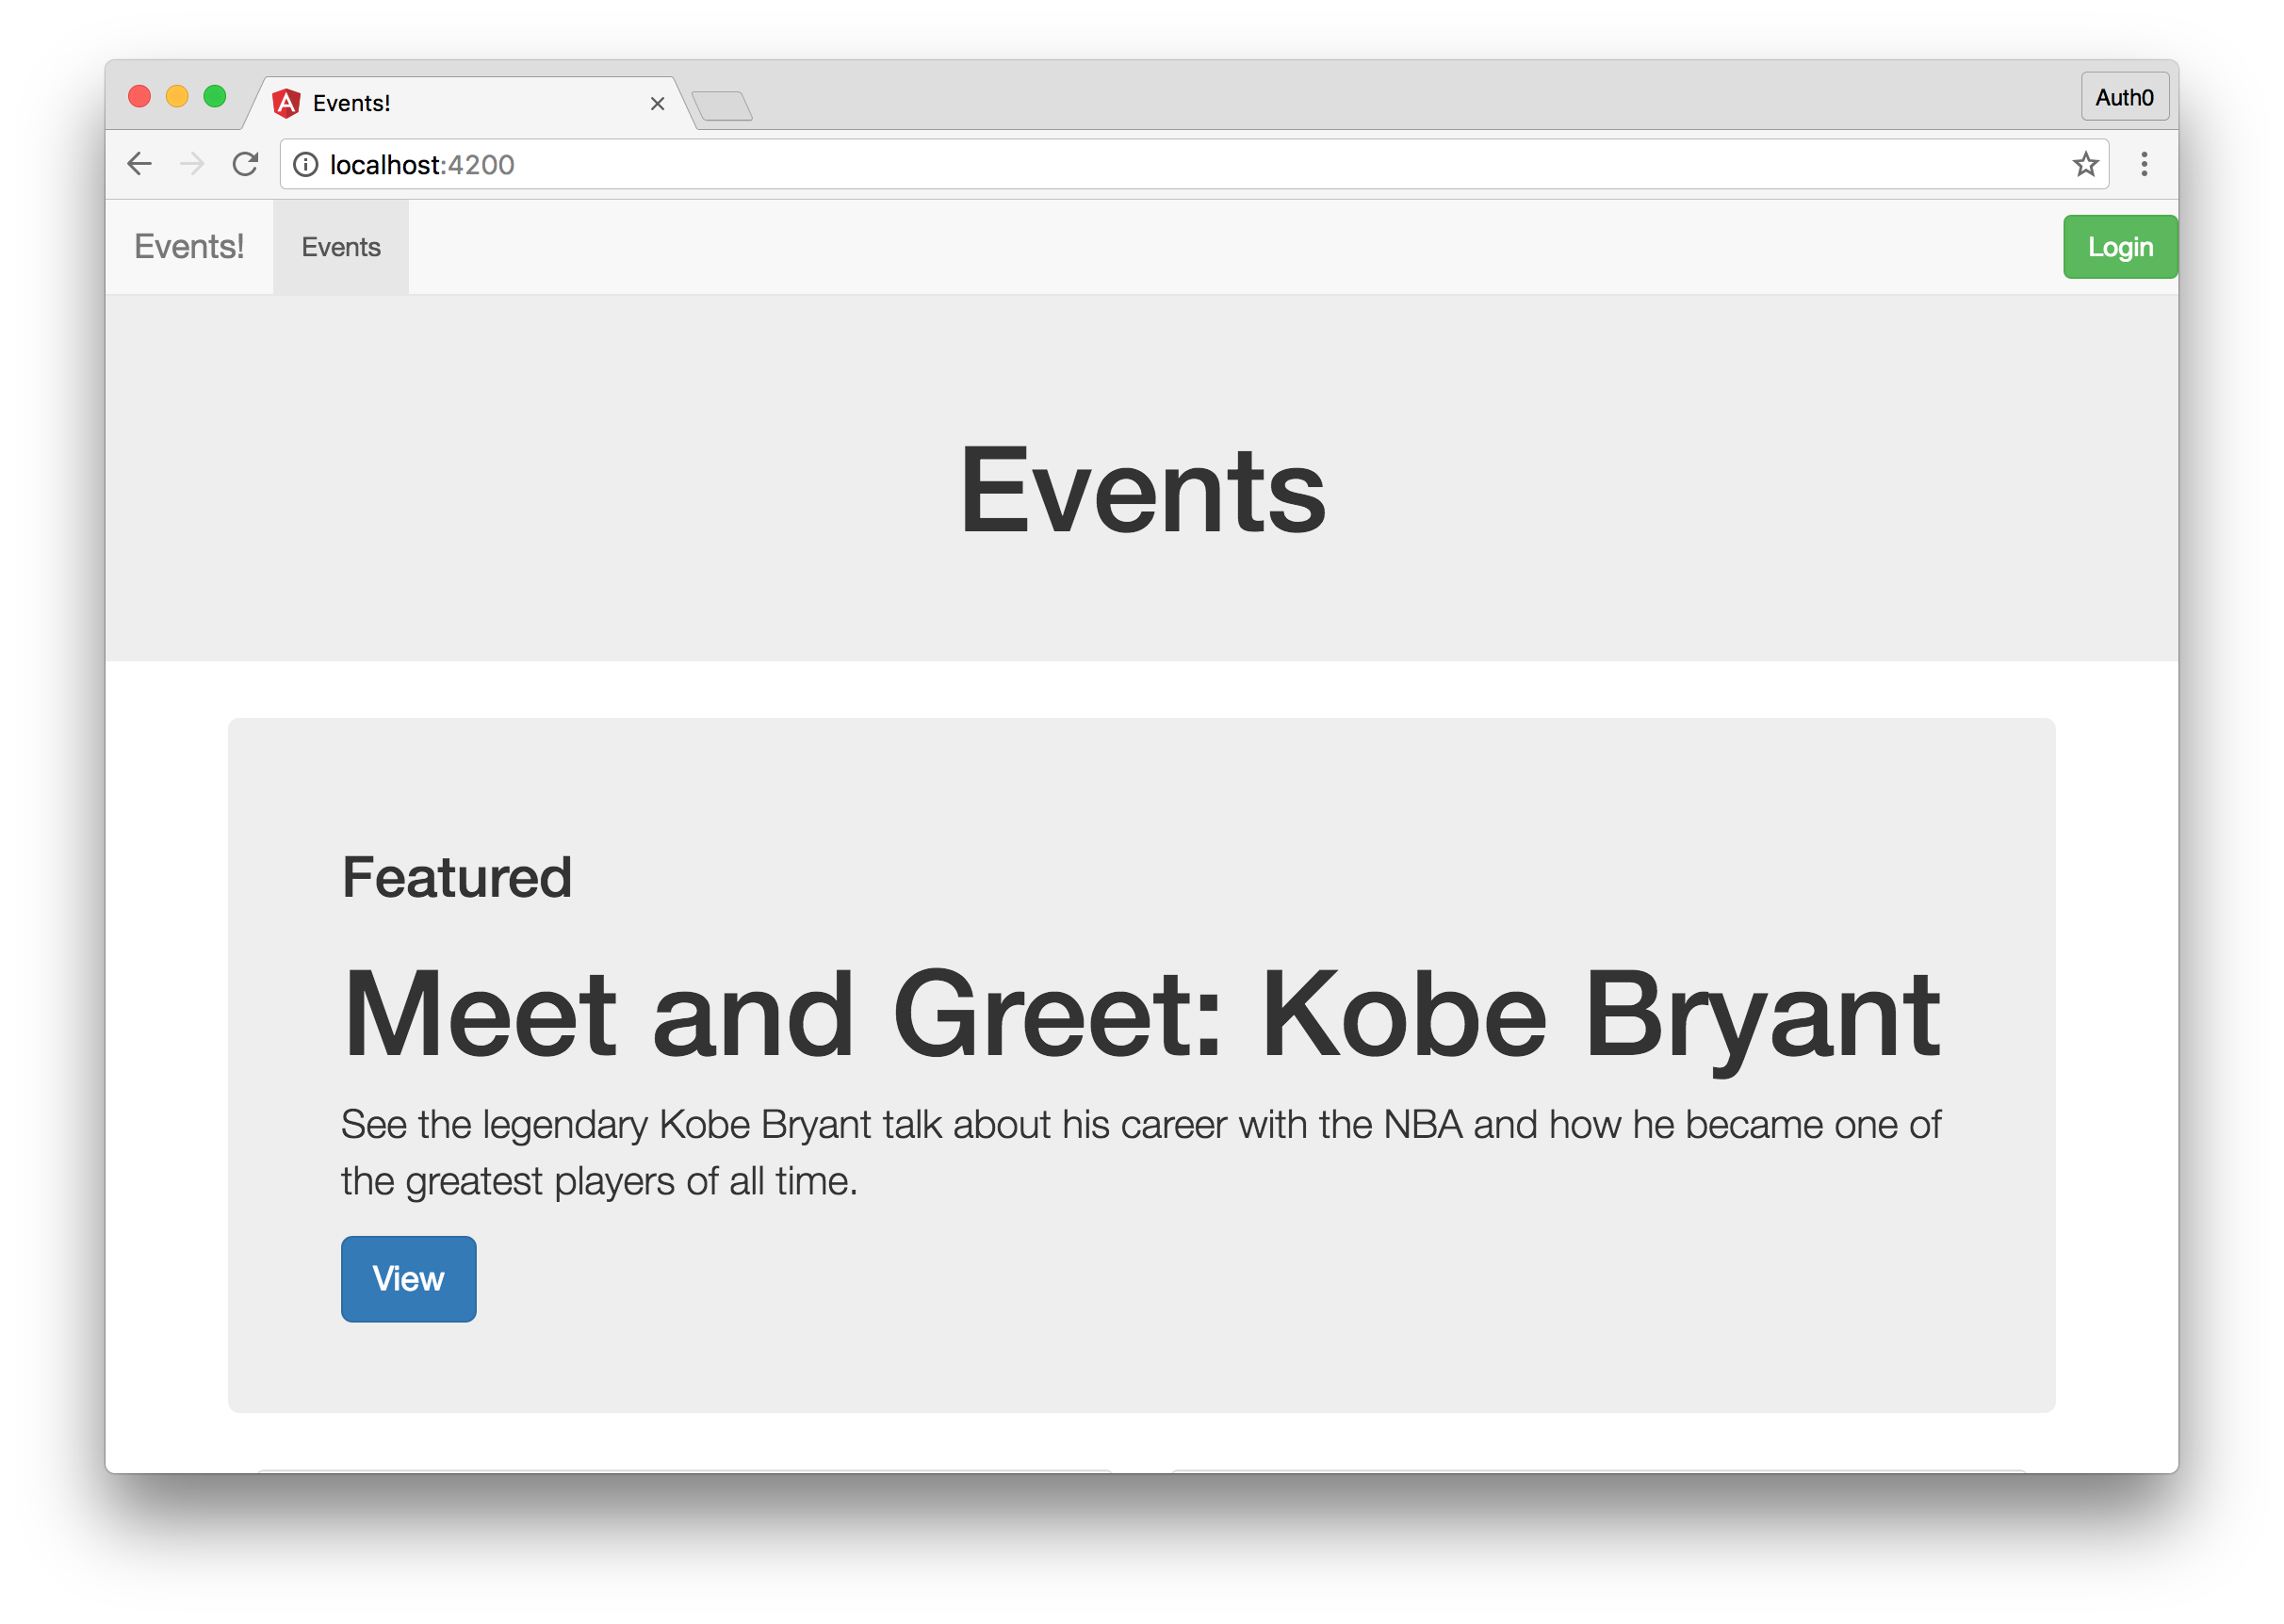
If you navigate to localhost:4200 now, you'll see the header and footer as well as the content of whichever page you are on displayed. We've added a bit of Ember.js functionality with the logical condition check, let's continue building our app. The next page we're going to build out is the homepage and events page. Open the events.hbs file and add the following code:
<div class="jumbotron text-center">
  <h1>Events</h1>
</div>

<div class="container">
  <div class="row">
    {{#each model as |event|}}
      {{app-event event=event}}
    {{/each}}
  </div>
</div>
Open the app-event.hbs template next and add the following code:
<div class="col-sm-6">
  <div class="panel panel-default">
    <div class="panel-heading">
      <h3 class="panel-title">{{event.name}}</h3>
    </div>
    <div class="panel-body" style="min-height: 80px;">
      {{event.description}}
    </div>
    <div class="panel-footer">
      <ul class="list-inline">
        <li><a class="btn btn-sm btn-success"><span class="glyphicon glyphicon-thumbs-up"></span> {{event.votes}}</a></li>
        <li class="pull-right">
          <a class="btn btn-sm btn-default">Required: {{event.required}}</a>
        </li>
      </ul>
    </div>
  </div>
</div>
Let's explain a bit about what is happening. When the user hits the events page (or the homepage since that is our default page). We'll load our model data and run it through a forEach loop in events page. Then, for each event we get, we'll use our app-event.hbs template and build a UI for the event passing in the data from our events page. If you look at your app now though, you will just see the header. Let's get our events from the Webtask we created and display them on the page. To be able to make requests, we'll first need to make a couple of edits to our application adapter. Open the file titled application.js located in the adapters directory. Add the following code:
// We are changing our default adapter to use a REST Adapter
export default DS.RESTAdapter.extend(DataAdapterMixin, {
  // The host will be where our Webtask lives
  host: 'YOUR-WEBTASK-URL/api',
  authorizer: 'authorizer:application',
  // We will want to add an Authorization header containing our JSON Web Token with each request to our server. We'll get to this functionality a little later, but we can configure it now.
  headers : Ember.computed(function(){
    var token = JSON.parse(localStorage.getItem('ember_simple_auth:session'));

    return {"Authorization": 'Bearer ' + token.authenticated.id_token};
  })
});
With our adapter set, open up the events.js file next. Next add the following code to the events.js file:
import Ember from 'ember';

export default Ember.Route.extend({
  model() {
    // This will make a GET request to our webtask and get all of the events
    return this.store.findAll('event');
  }
});
Now if you visit your localhost:4200 or localhost:4200/events route you will notice that your application has crashed. Ember.js does not know how to handle the events we are returning. We'll need to build a model that will tell Ember.js how to consume the data it gets. To add a model with Ember.js, we'll run the ember generate model event command. Next open the event.js file located under the models directory and add the following code:
import DS from 'ember-data';

export default DS.Model.extend({
  name: DS.attr('string'),
  description: DS.attr('string'),
  votes: DS.attr('number'),
  required: DS.attr('number'),
  featured: DS.attr('boolean')
});
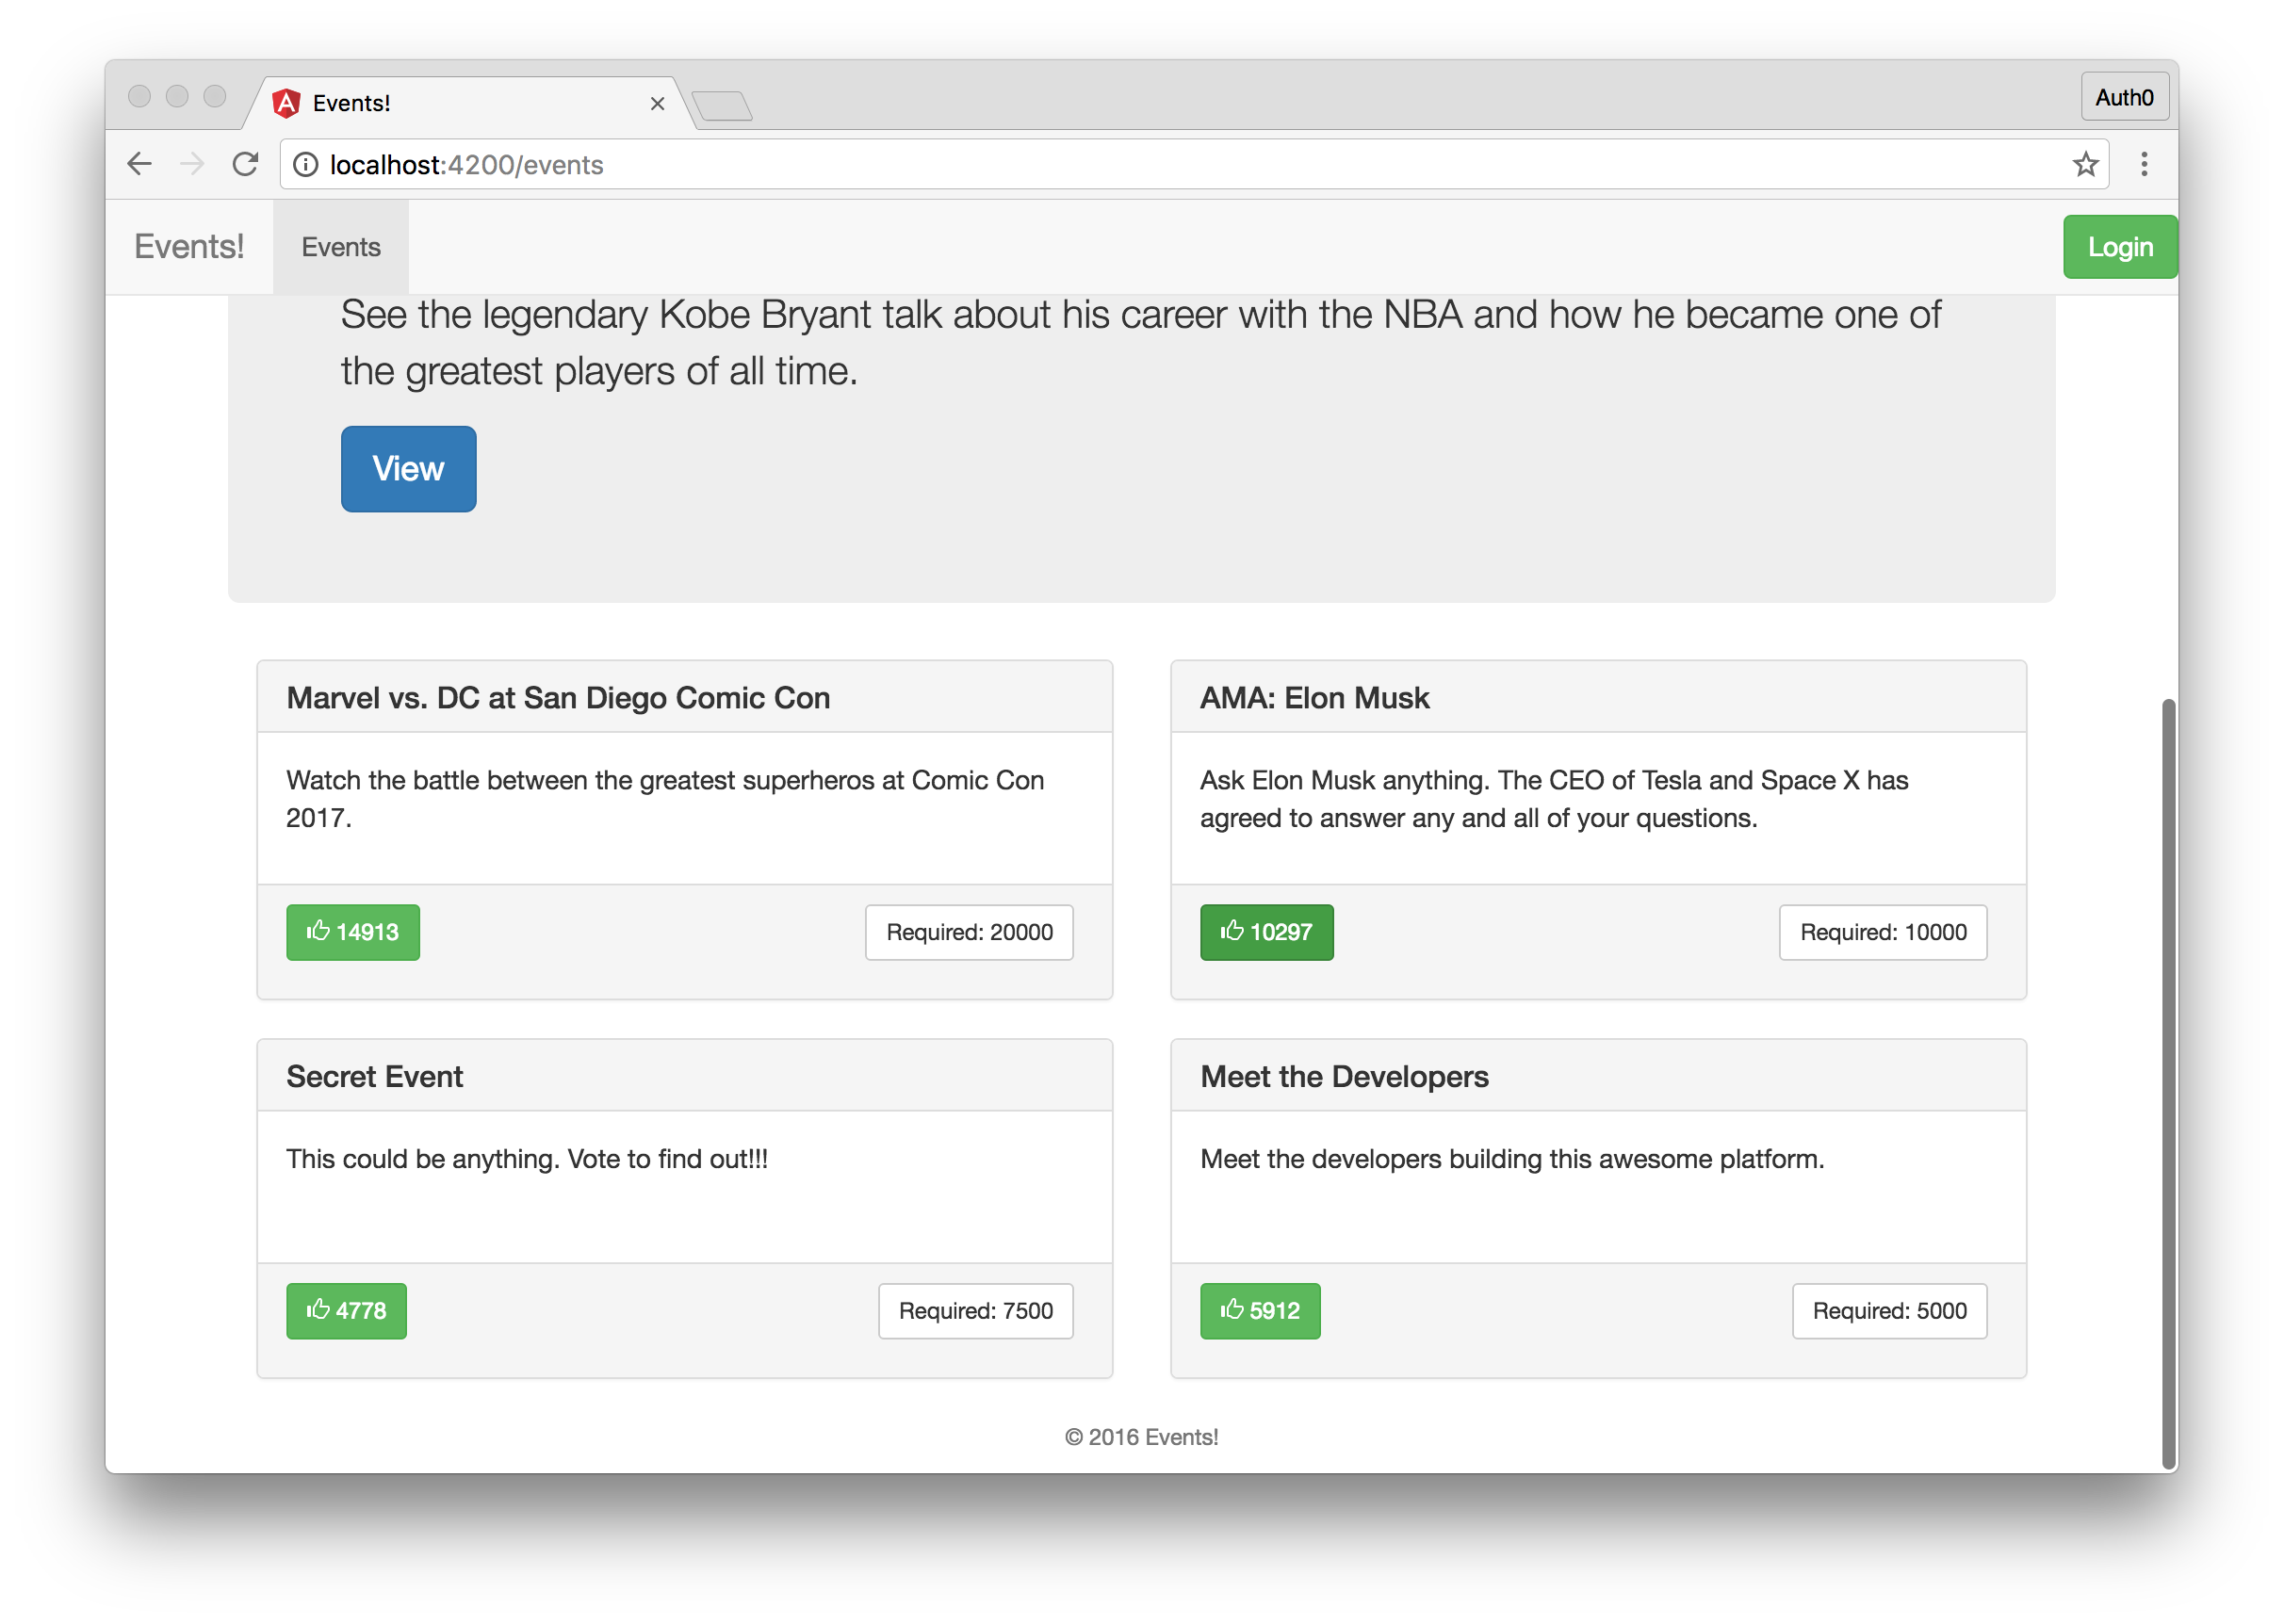
Our model describes all the properties that that a particular event will have. Now if we go to localhost:4200 we'll see all of our events properly displayed. The UI looks a little weird though. We have an odd number of events. Let's make a few changes to our events.hbs file to have a much cleaner ui. We'll make the following edits in the loop where we iterate over our events:
...
{{#each model as |event|}}
      {{#if event.featured}}
        <div class="jumbotron">
          <h2>Featured</h2>
          <h1>{{event.name}}</h1>
          <p>{{event.description}}</p>
          <a class="btn btn-lg btn-primary" href="/event/{{event.id}}">View</a>
        </div>
      {{else}}
       {{app-event event=event}}
      {{/if}}
{{/each}}
...
If you look at the page now, you'll see a featured event at the very top. This looks much better. Next, let's edit our event.hbs file and add the user interface for viewing a single event. Our code will be very simple here since we are reusing a component we've already created:
<div class="container">
  <div class="row">
      {{app-event event=model}}
  </div>
</div>
To add the functionality to retrieve and display a single event, let's go ahead and open the event.js file in our routes and add the following:
import Ember from 'ember';

export default Ember.Route.extend({
  // We'll capture the route parameters and use the id to retrieve a single record from our Webtask that matches the id of the event
  model(params){
    return this.store.findRecord('event', params.id);
  }
});
So far so good. Our app is really coming together. The last piece of functionality we'll add is the ability for a user to vote on which events they'd like to happen. To do this, let's open our app-event.js file under the components directory. Here we will add an action called vote which will allow a user to vote for an event. The implementation is as follows:
import Ember from 'ember';

export default Ember.Component.extend({
  // We'll inject our store service
  store: Ember.inject.service(),
  actions: {
    vote: function(event) {
       var store = this.get('store');
       // We'll find the event by id and if we get an event from the Webtask, we'll increment its votes attribute by one and save the data by making a POST request to our Webtask.
       store.findRecord('event', event.id).then(function(event) {
        event.incrementProperty('votes');
        event.save();
      });
    }
  }
});
With the functionality in place, let's go ahead and add the action to our template. Open the app-event.hbs file and add the action {{action 'vote' event}} to our success button. Save the file and let's test the functionality by navigating to localhost:4200 and voting on a couple of different events. You should see the counters incremented in real time. We don't want just anyone to be able to vote though, so we'll require the user to be authenticated before they can cast a vote. Let's implement this final functionality next.
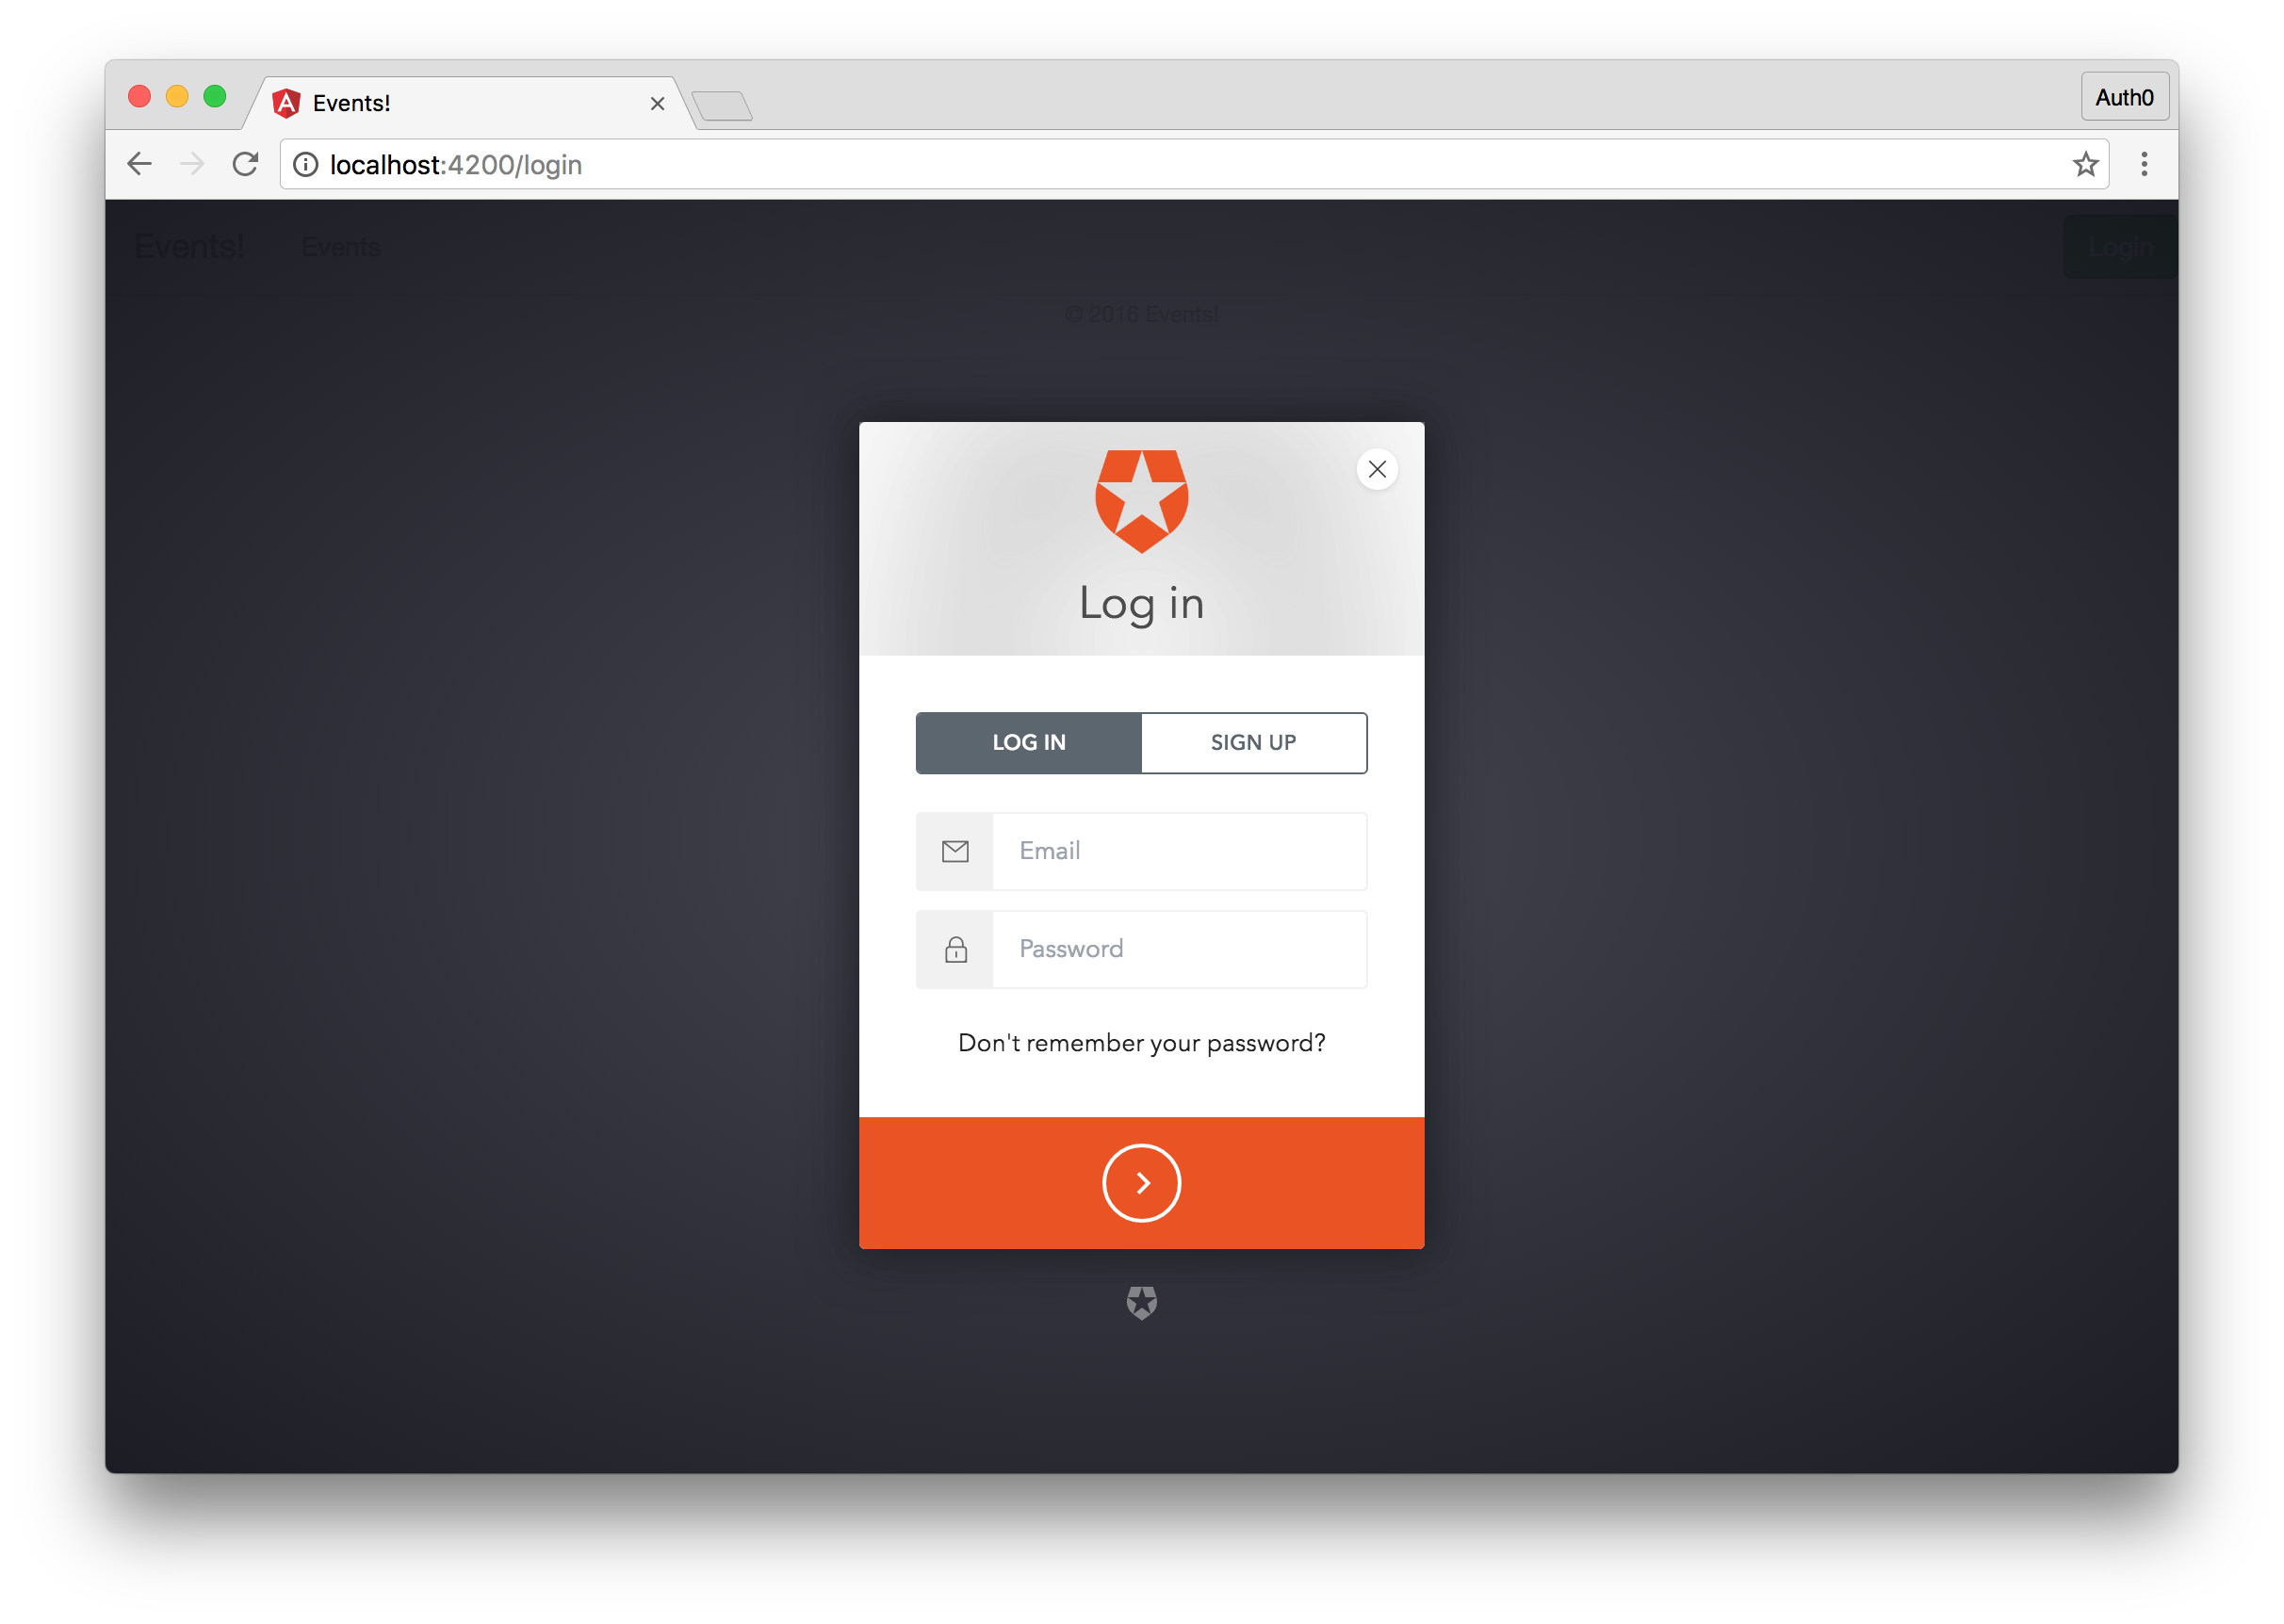
We already have a pretty good base for authentication since we are using the Auth0 quickstart and have already done some configuration to ensure that we can implement our login system quickly. Our implementation is actually all ready to go. All we will need to ensure is that in our Auth0 management dashboard, we have localhost:4200/callback as an allowed callback URL. Once that is ready, click on the Login button and either login or register. If all went well you will be logged in and the green login button will be replaced with a red logout button.
Now let's ensure that only users who are authenticated can make a request to our backend. Open the app-event.js. We are going to replace the current implementation with the following:
vote: function(event) {
      var store = this.get('store');
        store.findRecord('event', event.id).then(function(event) {
          event.incrementProperty('votes');
          event.save().catch(function(error){
            event.decrementProperty('votes');
            alert(‘You must be logged in to vote');
          });
      });
}
We'll also need to make one edit to our Webtask. Open up the api.js Webtask file and add the following to the module.exports function:
...
module.exports = wt.fromExpress(app).auth0({
  clientId: function(ctx, req){return 'YOUR-AUTH0-CLIENT-ID'},
  clientSecret: function(ctx,req){return 'YOUR-AUTH0-CLIENT-SECRET'},
  domain: function(ctx,req){return 'YOUR-AUTH0-DOMAIN'},
  exclude: function (ctx, req, appPath) { return req.method === 'GET'; }
});
...
Redeploy your Webtask by running wt-cli deploy api.js. When your Webtask is finished deploying, we'll have secured the PUT method. Now when a PUT request is made to the events/:id, the Webtask will make sure that the request is accompanied by a valid JSON Web Token (JWT). If it is, then the process will continue, otherwise, the Webtask will return a 401 Unauthorized. The rest of the routes will continue to work as they have before and anyone will be able to access them. To learn more about how Webtasks are authenticated check out our docs.

That's it! Today we've built a complete application with the latest release of Ember.js. We showed how you can easily add user authentication and protect your backend with Auth0. We also created an Express.js based backend with the Webtask serverless platform. I know this was a lot to digest, so if you have any questions, please let me know and I will do my best to answer them. If you are feeling adventurous on the other hand, why don't you expand on the Webtask functionality and add the ability for admins to create new events and test to see what you've learned.


About Ado Kukic
I am a Technical Writer at Auth0 where I write tutorials on various security related topics, develop and enhance open-source authentication libraries, and teach best practices when it comes to user authentication and authorization. When I’m not saving the web from plain-text passwords, I’m working on an endless list of personal projects.


Nice tutorial, thanks!
Did have a few issues though, some smaller ones and one show stopper.
– My domain seemed incorrect and I had to sift through my Auth0 account to find the actual domain. Found it eventually by selecting ‘clients’ from the menu and then selecting the ‘default app’. It appeared my domain had changed from what I had entered when signing up simply because I am in the EU.
– The host: ‘YOUR-WEBTASK-URL/api’, entry in the application.js requires the full domain name, including ‘https://’
– and finally you wrote at some point: ‘Open the app-event.hbs file and add the action {{action ‘vote’ event}} to our success button.’ And I couldn’t continue from there as I have no idea what was meant here.
Cheers!
That’s why I love Ember.js.
Nice post, David!
My bad, thank you Ado Kukic.
Also, clicking on the login button give me a
Uncaught UnrecognizedURLError: /login
….
And finally ‘wt-cli deploy api.js’ generates an error, it doesn’t recognize ‘deploy’…
I got it to work using ‘wt-cli create api.js’
There are also typos in these filenames ‘routes.js’ and ‘environement.js’.
Oh, the UnrecognizedURLError was mysteriously (and ONLY) fixed by adding another route… ’ember generate route WTF’
I ended up with an error with the final step with updating
module.exportwithauth0variables and recreating webtask:{ code: 400, message: "Error processing request URL path." }Any thoughts to overcoming this error?
(solved)
update: current workaround until they fix this:
As a workaround you, can you switch to the old format, if your webtask url is https://{subdomain}.run.webtask.io/test?webtask_no_cache=1 it will become https://webtask.it.auth0.com/api/run/{subdomain}/test?webtask_no_cache=1.