Introducing MooTools HeatMap
It's often interesting to think about where on a given element, whether it be the page, an image, or a static DIV, your users are clicking. With that curiosity in mind, I've created HeatMap: a MooTools class that allows you to detect, load, save, and display spots on a given area where a user has clicked.
The CSS
There's really only one CSS declaration you'll need to make with HeatMap, and that's the CSS class that represents how a spot should look. A sample spot CSS class could look like:
.heatmap-spot	{
	width:6px;
	height:6px;
	margin-top:-3px;
	margin-left:-3px;
	-webkit-border-radius:4px;
	-moz-border-radius:4px;
	background:#fff;
	position:absolute; /* important! */
	z-index:200;
}
HeatMap was created to allow spot styling to look however you'd like. Note that you'll want to add negative margins to the spot depending on how large you create the spot.
The MooTools JavaScript
The class is relatively compact but grew larger than I had expected. HeatMap allows for easy loading and saving of spots with minimal code. Here's the complete class:
var HeatMap = new Class({
	options: {
		event: 'click',
		load: {
			// request settings here
		},
		method: 'get',
		save: {
			// request settings here
		},
		spotClass: 'heatmap-spot',
		zone: ''/*,
		onClick: $empty,
		onSpot: $empty
		*/
	},
	Implements: [Options,Events],
	initialize: function(element,options) {
		this.element = document.id(element).setStyle('position','relative');
		this.setOptions(options);
		this.newClicks = [];
		this.oldClicks = [];
		this.attachEvents();
	},
	attachEvents: function() {
		var self = this;
		this.clickEvent = function(e) {
			var obj = self.getRelativePosition(e.page.x,e.page.y);
			obj.spot = self.createSpot(obj.x,obj.y);
			self.newClicks.push(obj);
		};
		this.element.addEvent(this.options.event,this.clickEvent);
	},
	detachEvents: function() {
		this.element.removeEvent(this.options.event,this.clickEvent);
	},
	getRelativePosition: function(x,y) {
		var position = this.element.getPosition();
		return { x: x - position.x, y: y - position.y };
	},
	load: function() {
		if(!this.loadRequest) this.loadRequest = new Request.JSON(this.options.load);
		if(!this.options.load.onSuccess && !this.loadSuccess) {
			this.loadSuccess = function(json) {
				json.each(function(click,i) {
					json[i].spot = this.createSpot(click.x,click.y);
					this.oldClicks.push(json[i]);
				},this);
			}.bind(this);
			this.loadRequest.addEvent('success',this.loadSuccess);
		}
		this.loadRequest[this.options.method]({
			load: 1,
			zone: this.options.zone
		});
		return this;
	},
	save: function(data) {
		if(!this.sendRequest) this.sendRequest = new Request.JSON(this.options.save);
		if(this.newClicks.length) {
			this.sendRequest.addEvent('success',function() {
				this.newClicks.each(function(click) {
					this.oldClicks.push(this.createSpot({ x: click.x, y:click.y }));
				},this);
				this.newClicks = [];
			}.bind(this));
			this.sendRequest[this.options.method]({
				save: 1,
				zone: this.options.zone,
				data: this.newClicks
			});
		}
		return this;
	},
	createSpot: function(x,y) {
		var spot = new Element('div',{
			'class': this.options.spotClass,
			styles: {
				top: y.toInt(),
				left: x.toInt()
			}
		}).inject(this.element);
		this.fireEvent('spot',[spot,x,y]);
		return spot;
	}
});
Arguments for HeatMap include:
- element: the element with which to listen for clicks on
- options: options for the class instance
Options for HeatMap include:
- event: (string, defaults to event) the event to listen for -- defaults to click
- load: (object, defaults to {}) the Request.JSON options object for loading spots
- method: (string, defaults to "get") the Request.JSON request type
- save: (object, defaults to {}) the Request.JSON options object for saving spots
- spotClass: (string, defaults to 'heatmap-spot') the CSS class for styling a spot
- zone: (string, defaults to '') the "zone" by which the click will be saved under; especially important if more than one spot is one the page.
Events for HeatMap include:
- onSpot: fires when a spot is created.
A relatively simple class. The class could have more complexity but I've chosen to keep it simple for iteration one.
HeatMap Usage
Using HeatMap is as simple as this:
/* usage */
window.addEvent('domready',function() {
	map = new HeatMap('ricci-map',{
		zone: 'cricci',
		save: { url: 'heat-map.php' },
		load: { url: 'heat-map.php' },
		onSpot: function(spot) {
			spot.setStyle('opacity',0).fade(1);
		}
	});
	document.id('loader').addEvent('click',function() {
		map.load();
	});
	document.id('saver').addEvent('click',function() {
		map.save();
	});
});
Much simpler than you had probably imagined! I'd recommend using click as the event -- using other types of events could be confusing to users and could result in massive amounts of data for mouseenter events.
The MySQL Table
My MySQL table looks as follows:
CREATE TABLE `example_heatmap` (
  `click_id` mediumint(6) NOT NULL auto_increment,
  `zone` varchar(60) NOT NULL default '',
  `x` smallint(5) NOT NULL default '0',
  `y` smallint(5) NOT NULL default '0',
  `date_clicked` datetime NOT NULL,
  PRIMARY KEY  (`click_id`)
) ENGINE=MyISAM AUTO_INCREMENT=22 DEFAULT CHARSET=utf8;
How you choose to set up the SQL side of this is entirely up to you.
The PHP Script
A few thing I'd like to point out about the server-side handling of HeatMap:
- You can use any server-side language to facilitate the loading of saving of spots -- I simply used PHP because it's what I'm most familiar with.
- Save your complaints about my usage of PHP's native mysql functions and the lack of validation -- my focus with this post is the JavaScript class.
Without further adieu, here's a PHP solution for saving and loading spots:
/* load  */
if(isset($_GET['load'])) {

	/* vars */
	$spots = array();

	/* connect to the db */
	$connection = mysql_connect('localhost','dbuser','dbpass');
	mysql_select_db('dbname',$connection);

	/* get spots */
	$query = 'SELECT * FROM example_heatmap WHERE zone = \''.mysql_escape_string($_GET['zone']).'\' LIMIT 2000';
	$result = mysql_query($query,$connection);
	while($record = mysql_fetch_assoc($result)) {
		$spots[] = $record;
	}

	/* close db connection */
	mysql_close($connection);

	/* return result */
	$json = json_encode($spots);
	echo $json;
	die();
}
/* save */
elseif(isset($_GET['save']) && isset($_GET['data']) && count($_GET['data'])) {

	/* vars */
	$query = 'INSERT INTO example_heatmap (zone,x,y,date_clicked) VALUES ';
	$queryRecords = array();
	$records = 0;

	/* connect to the db */
	$connection = mysql_connect('localhost','dbuser','dbpass');
	mysql_select_db('dbname',$connection);

	/* save! */
	foreach($_GET['data'] as $data) {
		$queryRecords[] =  '(\''.mysql_escape_string($_GET['zone']).'\','.mysql_escape_string($data['x']).','.mysql_escape_string($data['y']).',NOW())';
		$records++;
	}

	/* execute query, close */
	$query.= implode(',',$queryRecords);
	mysql_query($query,$connection);
	mysql_close($connection);

	/* return result */
	die(count($records));
}
I prefer to use one script for both the saving and loading of spots -- using one script cuts down on the number of files you need and the logic to handle multiple functionality isn't difficult to organize within that one file.
Bring the Heat!
MooTools HeatMap is something I find incredibly fun. You could use HeatMap on an image, a static DIV, or the entire body. If you don't want the user to see spots and simply want to track their clicks, you could hide spots and periodically save clicks. Have fun with this class and let me know if you have suggestions!


OMG don’t load clicks, just trust me it works…. what have people done. Sweet work thou David, would be really useful on lots of sites – people pay big bucks for this stuff.
Really really really really bad idea to allow loading of others’ clicks on that pic.
–NSFW–
I would really like to see more heat-map like results combined and color-coded
I saw that coming. (snare). Cleared out again.
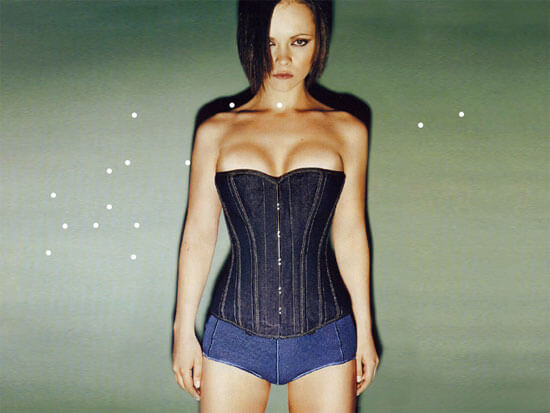
Screw the post, who is this girl? :)
Christina Ricci…the one and only.
Excellent job … again :P
Great Job once again David!! any chance that this is available for jQuery?
I believe Chris Coyier has something similar at CSS-Tricks, but it’s a bit old now. Probably still works great though.
Pretty cool, but it should NOT be called heatmap. Clickmap would be more accurate, as this doesn’t actually produced weighted results.
Possibly, I struggled with naming. In the end, however, it does show the heat of where users are clicking, mouseover-ing, etc. I couldn’t call it ClickMap because the user may try another event.
If you made the dots have like 10% opacity or something, then you could see each click, and where there was a lot of clicks close together, the group of spots would be more opaque…
I didnt look @ the code or the doc yet, but would this be applicable on a web page (per say) or just on images?
Anywhere Avi. You can set the element argument to any element on the page. :)
WOW… Very impressive!! Great Job David… Great Job!
I wouldn’t call that “HeatMap” either, thats absolutely not the right word. While we’re at it, check this out: http://www.patrick-wied.at/static/heatmap/
Hi Fabian, that also is pretty cool, but doesn’t it only works with browsers that support HTML5?
Has nothing todo with HTML5, you need a browser that knows about . :)
Hi Fabian, please excuse my ignorance here, but the example uses the tag to show the “hot spots”, when u try that same example on a non HTML5 supported browser, the example doest work. Hence the comment “works only with browsers that support HTML5”. So how does that have nothing to do with HTML5? and what do u mean when u say “you need a browser that knows about”?
on v faire comme ci cela marchait !
oui, dac!….. alors aparament que faire semblant c’est toujours la solution desirable!! ;))
This class will be renamed to ClickMap once the MooTools Forge allows for project change abilities.
Cool! Curious, but in what ways would this be applied to website? BUt great piece of work!
How about putting a light opacity on the dots. Then each time a dot is placed over another the opacity thickens and that way you get better visual information. Also you could do it with different colors or shades, i.e. each time a dot is clicked the color is replaced with a darker one #EEE -> #DDD.
Good idea!
It doesn’t appear to be saving clicks
Can you do this so it saves automatically???
Hey David, thanks for the great class!
I’ve found what looks like a bug – after a successful ‘save’ request, we push each old click into oldClicks using
this.oldClicks.push(this.createSpot({ x: click.x, y:click.y }));. The signature for createSpot is (x,y) so this fails; I presume you intended to just pass the json object straight into .push()? With that modification it works beautifully.Anyway, I’m building something pretty awesome with this as inspiration – I’ll let you know when it’s ready for general consumption. Thanks again!
Dan
I am amazed that no one asked this question. Let’s say i want to track clicks for my entire website , what will happen between different screen resolutions , so let’s say a user is on 1024×768 screen resolution , the other one from desktop again is on 1024×640 and one more from a mobile phone.
At last i am looking at my website report using a totally different screen resolution let’s say 1280×720. Isn’t it going to create a mess.
Any thoughts on this ( David you have life saver all the time, i want you to be my hero again ? )
I am amazed that no one asked this question. Let’s say i want to track clicks for my entire website , what will happen between different screen resolutions , so let’s say a user is on 1024×768 screen resolution , the other one from desktop again is on 1024×640 and one more from a mobile phone.
At last i am looking at my website report using a totally different screen resolution let’s say 1280×720. Isn’t it going to create a mess.
Any thoughts on this ( David you have been a life saver all the time, i want you to be my hero again ? )